Renaming Elements by Find/Replace
Introduction
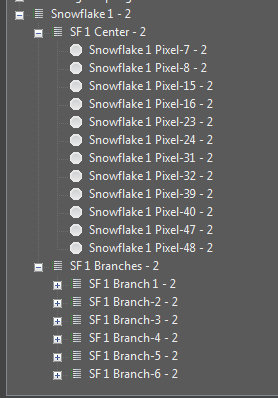
You may have element structures that were created with names that did not have the exact structure you wanted or have evolved over time and need some restructuring. The standard rename function has abilities to rename multiple items via a sequential template format. At times, this may be too rigid for your needs and a simple find replace mechanism can better serve the purpose. An example is shown below where the paste as new function was used to duplicate a element group structure. The groupings themselves have elements that have been restructured out of a sequential naming structure. The intent here is to remove the - 2 on the end and change it from Snowflake 1 to Snowflake 5. This way the newly cloned element group will match the pattern of the original ones it was cloned from. See element duplication for additional details. Starting in 3.6 and above this can be done from the Display Setup or the Preview Setup forms.
Steps
-
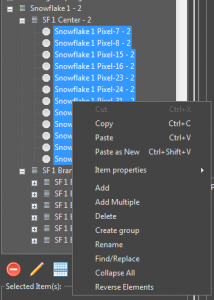
Select a group of elements to Find/Replace naming patterns. They can be all together, or slected from multiple different levels. Select only the items you wish to act on.
-
Right click on the selected items and choose Find/Replace.
-
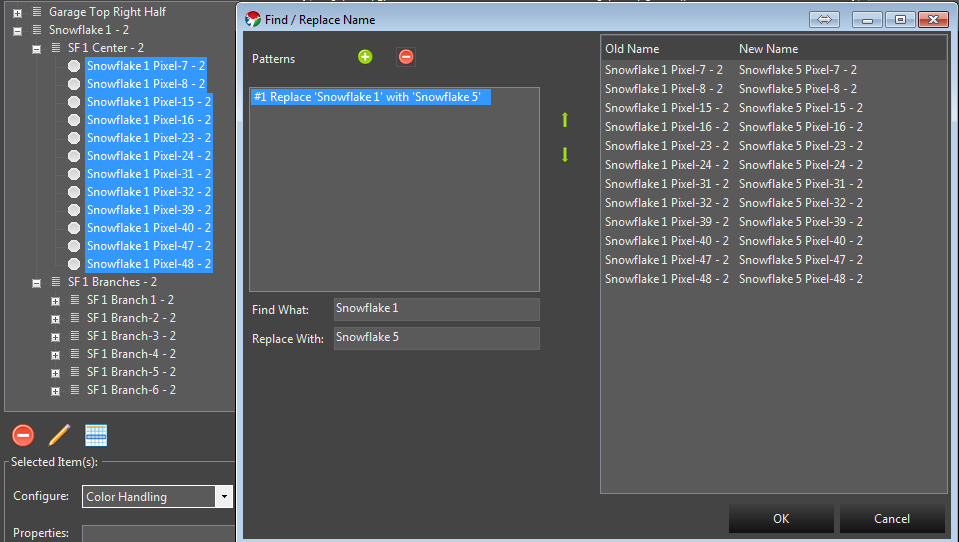
On the dialog box that appears you can create patterns of find and replace. Patterns can be chained to allow for multiple find replace operations in one pass without having to do the Find/Replace operation multiple times.
-
First we will create the pattern to rename Snowflake 1 to Snowflake 5. In the Find what text field we put Snowflake 1. In the Replace with text field we put Snowflake 5. You will notice the list at the left showing on the fly what will happen as you type the values in.
- Next we also want to remove the - 2 on the end. So we click the green + button to add a new pattern. This new Find/Replace will occur on the result of the previous pattern. We enter a the - 2 in the find what. Notice we enter a blank space in front because we also want to remove the blank that is there. - 2. Because we want to replace that with nothing, we leave the replace with text field empty. The list on the right updates to reflect the result of all our changes.
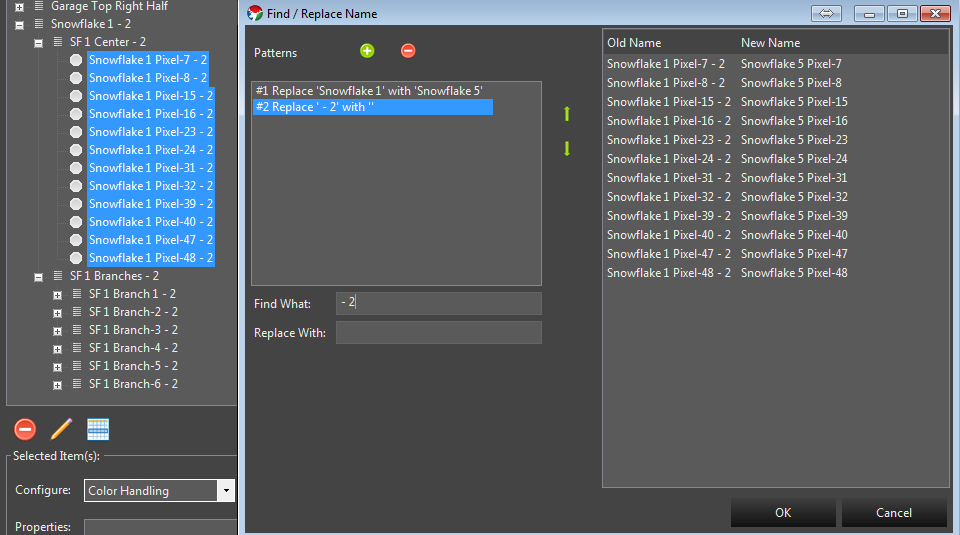
- Now that the list on the right reflects what we want the elements to look like, we can click the ok button and the changes will be applied.
Feedback
Was this page helpful?
Glad to hear it!
Sorry to hear that. Please tell us how we can improve.