Display Setup
Overview
The first step in creating a new display is tell Vixen about the elements in your display. There are two main areas that drive the setup of your display. The Preview Setup and the Display setup. In older versions of Vixen this would start in the Display Setup, but in the current versions, you should begin in the Preview Setup.
Preview Setup
From the main screen launch into the Preview Setup using the Setup Previews button. If this is your first time you will be presented with the preview setup screen.
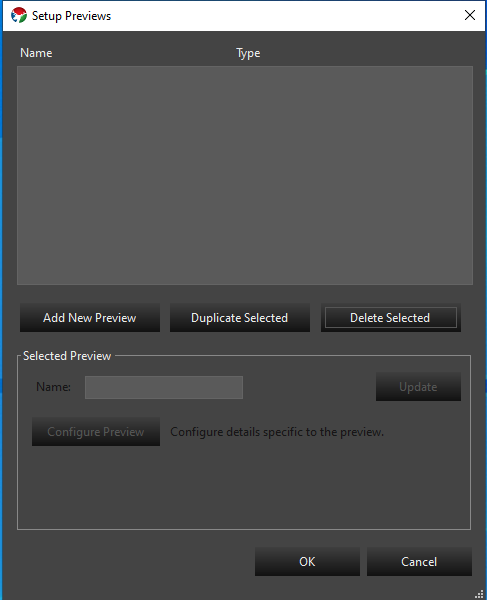
Create a new preview by clicking the Add New Preview button. Choose Vixen Display Preview from the list and click Ok. A new preview will be added. You will notice a window for the preview has now been created. In the list there is checkbox next to the preview. This controls if the preovew is visible or not. In the section for Selected Preview, you can give your preview a better name. Once you have chosen a name click the Update button. Vixen supports multiple previewss, but in most cases you will only use one.
Click the Configure Preview button to open the preview setup screen. This is where you will begin to build your display.
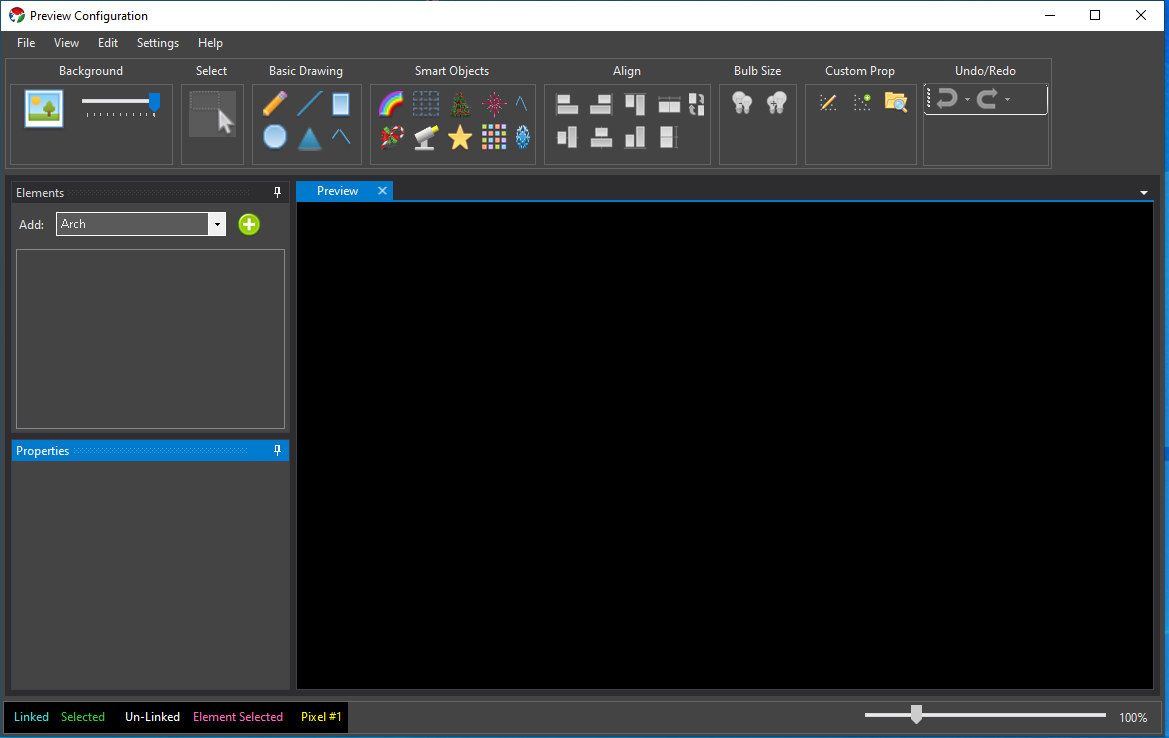
To build your display you will likley want to have a picture of your house or scene where the display will be presented. This will help you organize you props in the locations you intend to place them. A visual reference if you will. Take the image of your location and use your favorite editor to size it to something resonable for the resolution of your monitor. 1600 x 1200 is a a general ballpark unless you have a very large area or dense display. To add the picture, click the picture icon in the upper left in the Background section. Navigate and choose the image file and click ok. Your image should be presented in the Preview tab of the screen. If it is larger than the screen window, there will be scroll bars to navigate around. The slider next to the picture icon can be used to adjsut how bright it is. You will likley want to dim the image down to simulate darkness so you can see the props. Now you are ready to add your first Prop. See Background for more information.
Add a Prop
For the getting started example, we are going to add an Arch. It is a simple prop and easy to configure to get going. In the Smart Objects section of the toolbar there is a rainbow icon representing an Arch. There are other icons representing other common types of props used in displays. You can read more about them in Basic Drawing or Smart Objects. If you have Props other than the predefiend types, you can add custom designs. See the section on Custom Props for more details.
Click the rainbow icon to select the Arch. Then in the large preview area that has you background image you can draw the shape. The best approach is to visualize a rectangular box where you want the Arch to be. Then start in the upper left of that area and click and drag to the lower right. You will see an Arch appear that you can drag to an approximate size. Don’t worry if the placement is not perfect or the size is off. Just get the basic shape created and it can be adjusted later. After releasing the mouse button, you will be presented with the setup screen for the Arch.
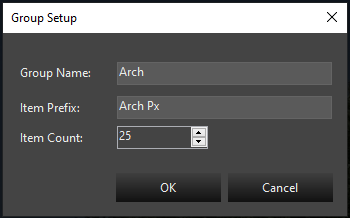
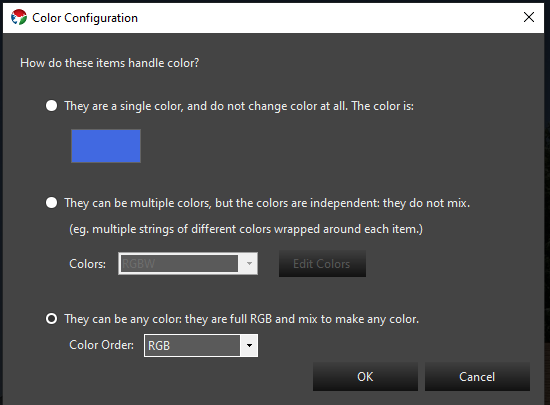
In this case we will define a pixel Arch. The default is typical and will have a name for the Prop called Arch. Each pixel node in the Arch will start with a name of Arch Px and they will be numbered using that pattern Arch Px-1, Arch Px-2, etc. Click Ok to select the defaults. The next screen will ask you if you want a dimming curve. For this example we are going to select No. You can read more about Dimming Curves later. The next screen will allow you to choose the color handling. The choices here will depend on if your lights are analog strings, dumb RGB, or full color RGB. In our case since we are setting up a pixel light arch, the default choice of any color and they are full mixing RGB is correct. The color order of RGB is generally correct for pixel lights. If the color order is different, that can be handled later in other ways.
After clicking ok on the color handling entry, you will be complete with the Arch setup. You will want to hit the Esc key or click the large arrow icon in the Select box in the toolbar to leave drawing mode if you do not want to keep adding more Arches. In drawing mode you can create multiple props of te same type one after the other without needing to click the smaart object icon again. See the Preview section for more details on adding props. After hitting Esc to leave draw mode, you can click the Arch on or near one of the lights and it will be selected. The Arch properties pane will be enabled also once it is selected to view the configuration. If you expand the Arch in left column, you can see the individual lights represented. These are called elements. Your screen should look similar to the following.
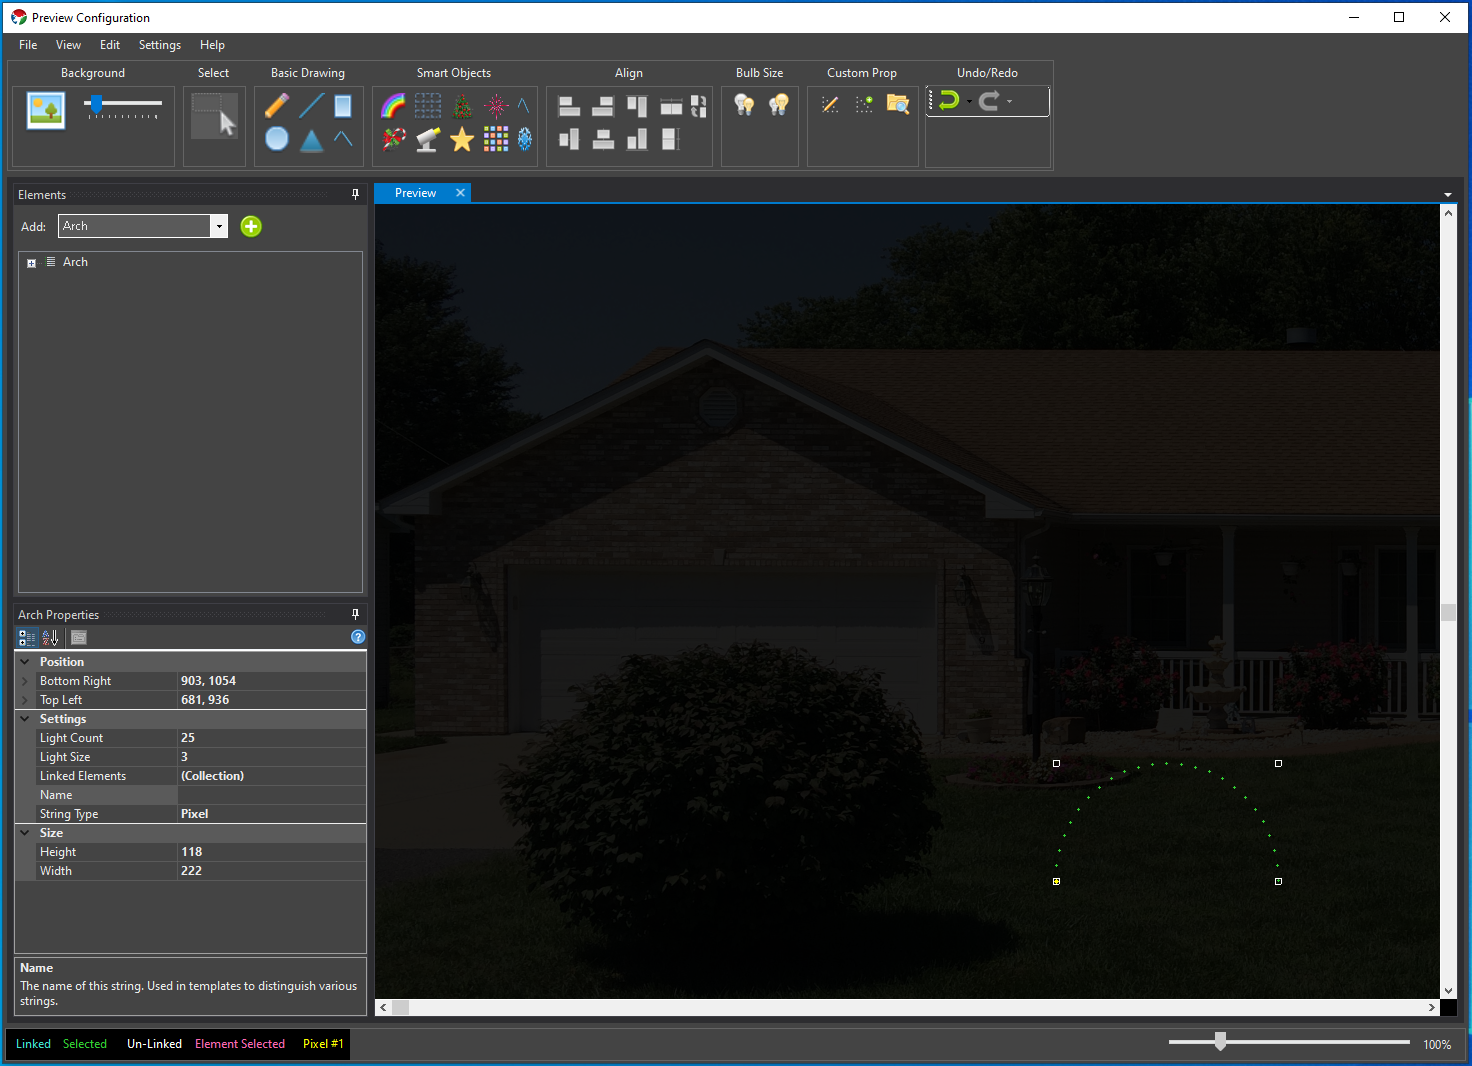
You can edit the location or size of your prop using basic drawing concepts. Click to drag it around. Use the handles when selected to resize it. There are also many other tools align props to each other. See the section on Align for more information.
For the purposes of this example you have an Arch that you can use for creating a sequence.
Further Reading
See the section on Element Setup for more information about how to create and manage your Props. The parts of a Prop are called an Element and many of these sections refer to editing elements specifically.
Feedback
Was this page helpful?
Glad to hear it!
Sorry to hear that. Please tell us how we can improve.