Dimming Curves
Dimming Curves
Dimming curves are generally used to reduce the overall brightness of a one or more lights. Generally this is used with RGB pixels. Dimming curves themselves are the very same curves you may be familiar with in the Sequencer for controlling brightness or other aspects of effects. They are utilized in the patching chain to affect the output to the lights. They will not affect the brightness shown in the preview. Here is a typical view of the patching chain for a single RGB pixel in the graphical view of the display setup.
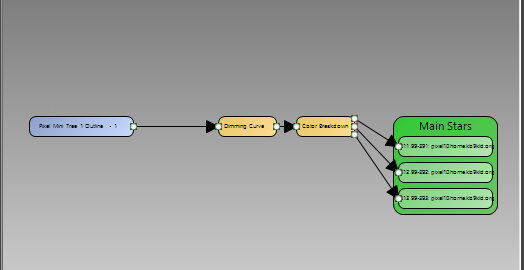
Typical patching with dimming curve.
The dimming curve typically precedes the Color Breakdown filter. This evenly affects all color values flowing through the path. The Dimming Curve wizard helps you add a dimming curve to your patching.
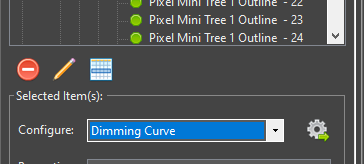
Invoking the Dimming Setup.
Setup screen.
The main setup screen helps you add the dimming curve. The typical choices here will be to update an existing dimming curve, or insert a new dimming curve after the element. If you are starting your patching, you will use the insert a new dimming curve. This is also true in the newer workflows in the preview when adding a prop or using the wizards and they prompt you to add a dimming curve. These new prop wizards will default to using the insert option. When updating an existing dimming curve, you may need to restart Vixen for it to take effect.
Dimming Curve Setup
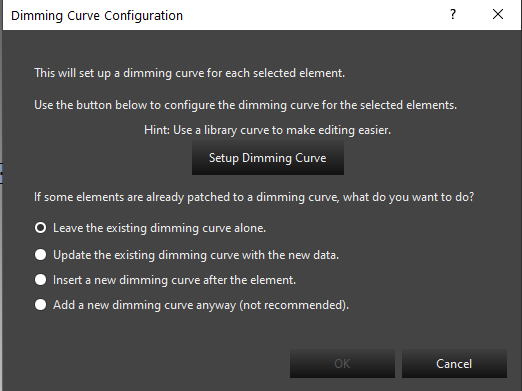
Clicking the Setup Dimming Curve from the Dimming Curve wizard will bring up the curve editor. This editor is used in other places to edit curves so it will become familiar to you. Below is the default curve that will be the starting point.
Default Dimming Curve.
This is a standard linear ramp. It is a mapping transform, so the value across the bottom is mapped to the the value on the left by moving up the graph to the curve line to find the outgoing value. The above curve will produce the same values out that come in and will not do any dimming. If we want our lights to run at 50% brightness, we will configure the curve as follows.
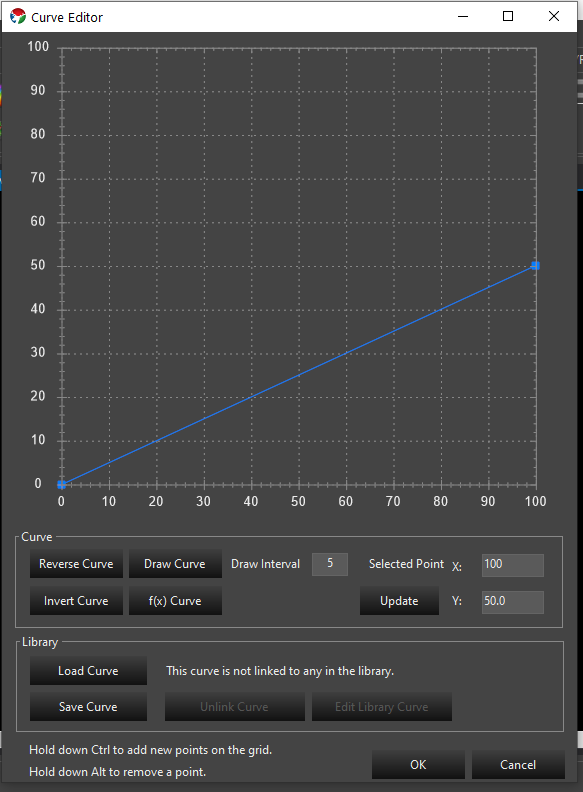
A common misconception is that the curve should be a flat line. A flat line will result in all values being mapped to the same brightness. This is generally not what you want.
Gamma Curves
Pixel based lighting has a linear brightness response. The human eye does not perceive these linear steps as being equal. There are many articles about using a gamma curve to compensate the linear response to something the human eye visualizes better. We can implement gamma curves in our dimming flow to do this compensation. There is a curve generator option in the curve editor to generate a gamma curve for you.
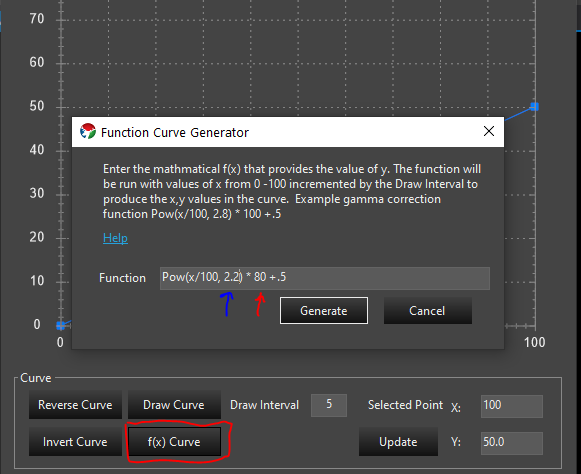
Function Curve Generator.
Using the f(x) Curve button you can invoke a screen to allow you to generate a gamma curve. The formula for a Gamma curve is in the screen. You can copy the example and edit it to your needs. The value indicated by the red pointer is the max brightness. In the example that is 100 and above it has been changed to 80 indicating that the max value for brightness is 80%. The value indicated by the blue arrow is the gamma value. A range of 2.0 – 2.4 is fairly typical. This value can be experimented with to find the value most appealing to the eye. If you happen to have gamma specs for your lights, you can use that value here. Above it has been set to 2.2.
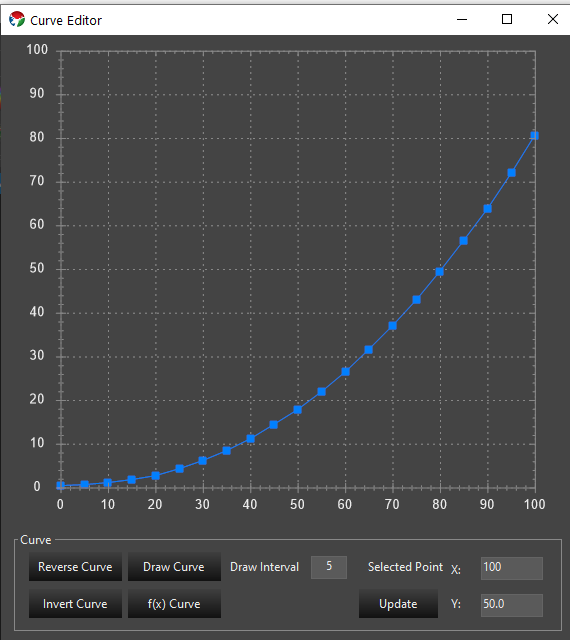
Gamma Curve with 80% max and gamma of 2.2.
The above image is the result of generating the curve with a 80% max brightness and a gamma of 2.2.
Library Curves
The best practice for adding dimming curves is to create the curve as a library curve. This allows you to edit the curve in the library to change the value instead of having to use the Dimming wizard to replace the curve anytime you wish to change the value. On the curve editor you can can save your new curve. This will save it to the library. Once you save the curve you will use the load curve button to load that saved library curve so library version can be used as the dimming curve. If you already have a curve saved you can load it directly and reuse one from other props. Library curves can be edited in the sequence editor in the curve library. Additional information on curves can be found here: Curves
Feedback
Was this page helpful?
Glad to hear it!
Sorry to hear that. Please tell us how we can improve.