Controller Setup
Overview
Hopefully by now you have made your first sequence and seen the visulaization of it play on a basic prop. You can create entire sequences and a whole show to visualize without ever needing to setup any controllers. But at some point you will want to see your hard work on some real props. At that point you will need to setup some controllers and connect your Props to the controlers. This is done by a process called patching.
Display Setup
The Display Setup screen is where the details of the controllers are managed. A bit of back history is relavent here. In past versions of Vixen, the Display setup is where you would have started. You would create your Props here first instead of in the Preview like the getting started guide demonstrated. You would create all the Props, and then have to go to the Preview and link them together. As time went along we realized that it was more efficient to combine that creation and linking process into a more seemless step. You can still do things the old way and you may see many references or videos showing that older method.
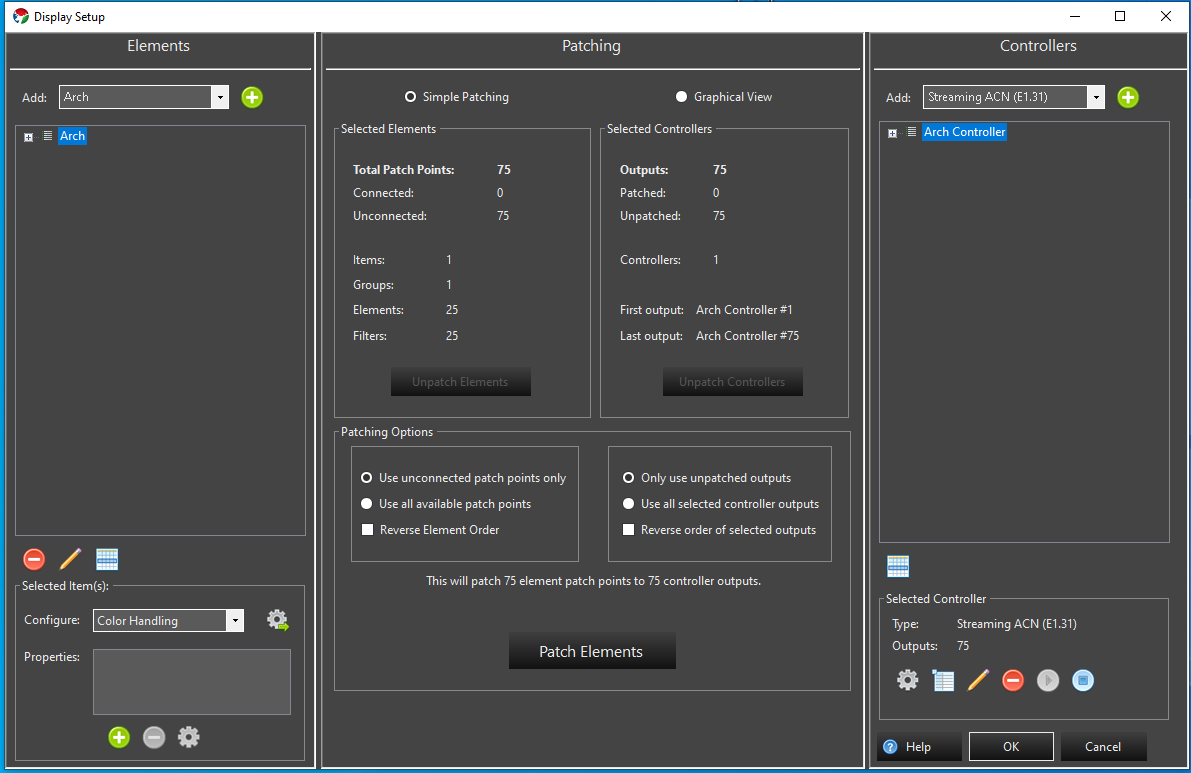
From the main screen, click the Setup Display button to open the window. On the left you will see the the familiar list of your Props in the tree layout. In the middle is information on the patching. The section on the right is where the controllers are configured. For this example we will assume you are using one of the common SACN e1.31 controllers commonly used for pixels. See Streaming ACN for more information on this protocol.
Add Controller
In the right hand column under controllers there is a drop down box to select the type of controller. Choose Streaming ACN (e.131) and click the green plus icon next to it. You will be prompted for a name. Choose something that will help you identify what this controller is used for, Click Ok. The next dialog will ask you for the number of outputs on this controller. This is the channel count you will be using. Each pixel typically uses 3 channels. One for each of the RGB colors. In our case of the ARch, we know we have 25 pixels, so 25 * 3 equals 75 channels needed. You may be using many Props on the same controller, so your channel count will need to reflect your needs. Try not to over allocate beyond what you need to use even if the controller suppports more. You can always come back and adjust the number of channels later.
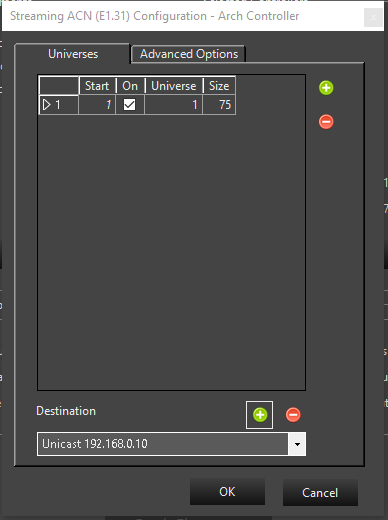
You now have a controller in the list on the right hand column. You can click the plus in front of it to expand and see the number of channels/outputs. The next step is to configure the universes. Select the controller and click the gear icon at the bottom of the column. You will be presented with the universe confguration screen.
This will need to match your controller setup. In this case we will assume you are using universe 1, our prop starts on channel 1 and we are going to have just 75 channels to match our Arch. Change the 510 in the last column to 75. Click the green plus at the bottom and set the IP Address of the controller. You should see something similar to this.

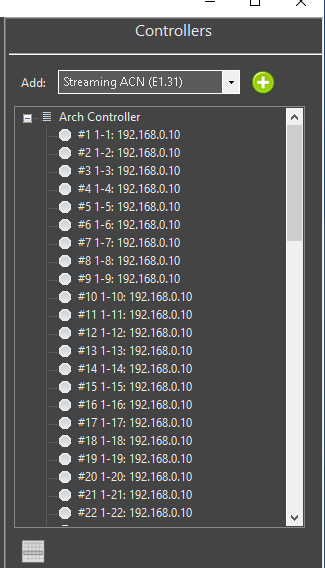
If it looks right, then click Ok. If you now expand the plus in front of the controller you will see the universes mapped to the outputs. The dots will be grey indicated nothing is patched to them.

Now I want to patch my Arch to this controller. I select the Arch in the left column and the controller in the right column. In the middle section I now see I have 75 total patch points on the selected elements (Arch Prop) and 75 outputs on the selected controller, so everything matches. The big Patch button is enabled in the bottom of the middle section and it indicates it is going to patch 75 element patch points to 75 controller outputs.

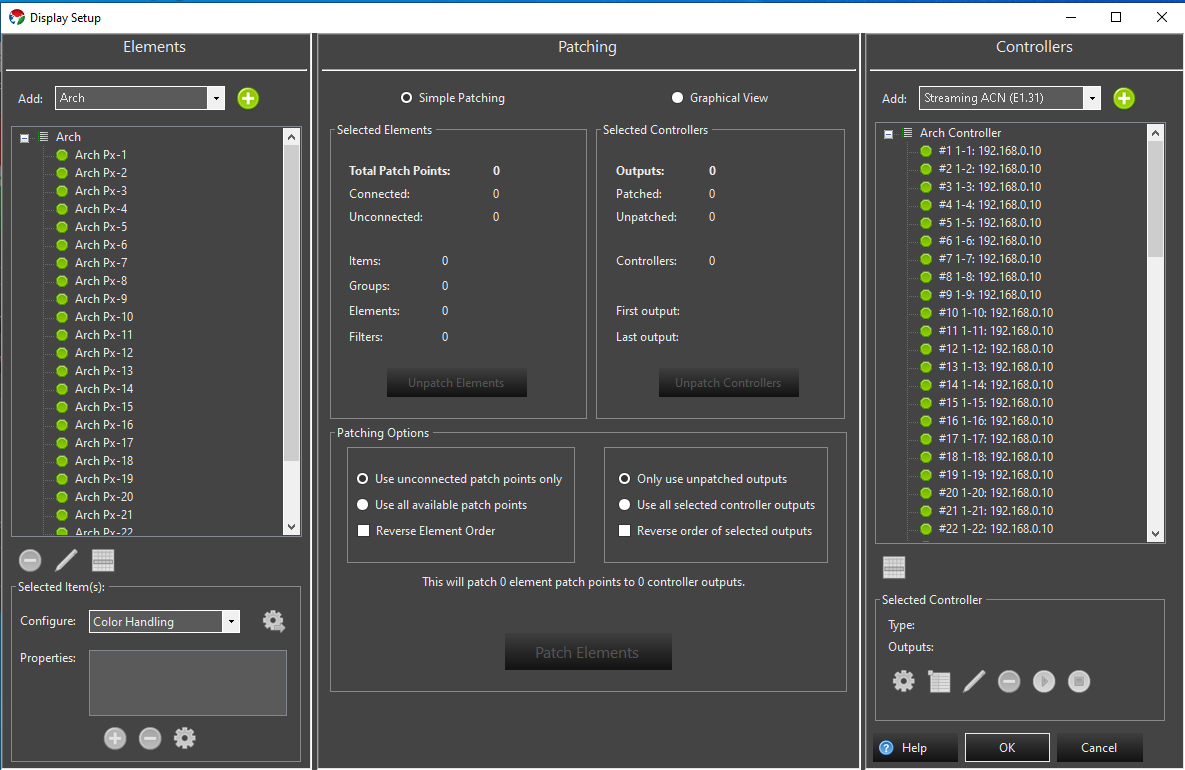
Click the Patch button. It will prompt a dialog indicating the patch details. Now if I expand my Arch, and the controller I see all green dots indicating they are connected.

Click Ok on display setup and then you can play your sequence. If all is properly confgured on the controller, you should see lights working when the effects are played.
Another Example
The above was a very basic example. In reality you will have many more Props and a more complex controller setup. See the e682 example for a more complex setup with controller screen shots. Some of the Vixen screns are from older versions without the dark styling, but the concepts are all the same.
Further Reading
See the section on Patching Setup for more in depth details about the patching process and the tools available to help.
Feedback
Was this page helpful?
Glad to hear it!
Sorry to hear that. Please tell us how we can improve.